This is my how tutorial for making the Clifford 20:20 VR Gunstock.
The end result is more solid and has a better feel than the cheap crap I
kept buying and trying to make work.
I call it the 20:20 because to costs about $20 bucks to make and takes
about 20 minutes to build.
Parts.
2 - 1 1/2" Schedule 40, 90 Degree Elbow $1.58 ea
1 - 1 1/2" Schedule 40, 45 Degree Elbow $1.69
1 - 1 1/2" Schedule 40, T-Joint $1.98
1 - 10' Schedule 40 pipe $6.12
Rope 4-5' most hardware stores sell it by the foot for about .40 a foot.
Any Thermoplastic, 100 grams is plenty and cost about $5 bucks on amazon
Approximate cost: $19.95

Yes the photo shows way more rope and thermoplastic, im just showing what i used.
The measurements in these instructions are ideal for me. (im 6'2")
you might prefer some slight differences, longer here,
a little shorter there, but since you have 10 feet of pipe
you can make modifications with all the left over pipe you have.
Just start out with my measurements
First, cut the following 6 lengths of pipe
Pipe Cut List
---------------
P1: 2 3/4"
P2: 2 3/4"
P3: 9"
P4: 3 1/4"
P5: 1 1/4"
P6: 1 1/4"
Here are all the parts, labeled and arranged in an exploded view

Tip: DONT GLUE IT TOGETHER UNTIL YOU USE IT A FEW DAYS!!
Drill a hole for the carry strap in E1 and P4
Tie a knot keep it in place. do the final knots later to adjust to preference.
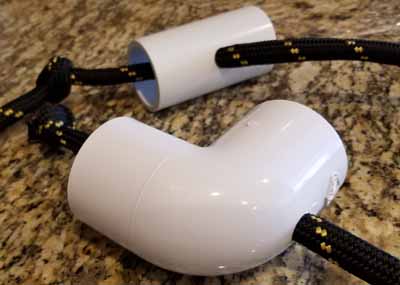
The Elbow is a more brittle PVC, drill it slowly and easy on the pressure
I cracked the first elbow I tried to drill on the drill press.
You might optionally choose to drill P2 as the pipe is far easier to drill
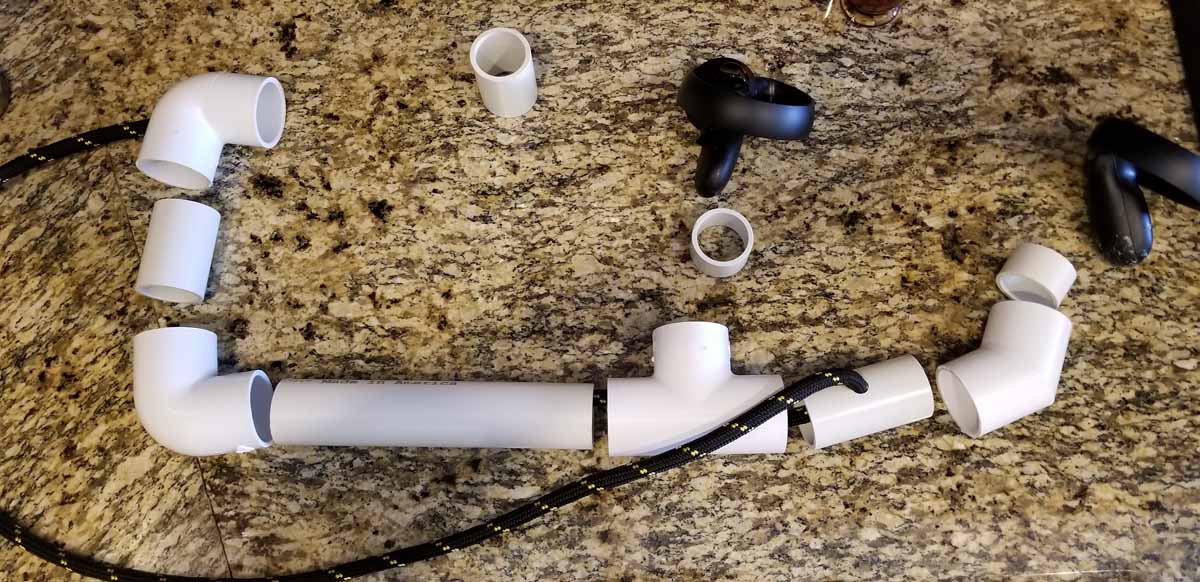
Assemble everything *EXCEPT* P5 & P6
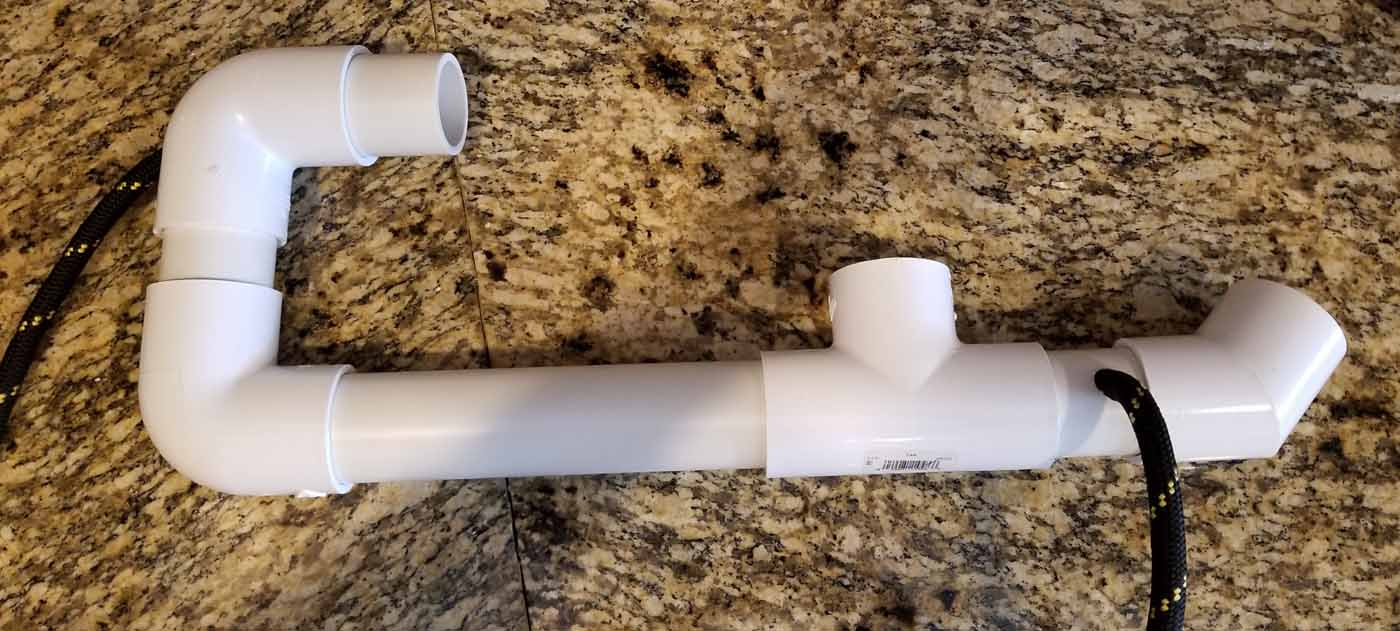
This next part is pretty easy, but I had a hard time trying to take a picture
that adaquately showed what its supposed to look like.
P5 & P6 are sort of "adapter sleeves" for the rift controllers
the female ends where the controllers go into T1 & E3 are too big.
An Oculus Controller slides in nearly perfect into the stock inner diameter of the 1 1/2" pipe.
So we are using these little pieces as "adapters".
Since this is a gunstock, the grip buttons will need to be firmly held in by the stock.
This is where the thermoplastic comes into play.
Put a pot of water on the stove.
DO NOT BOIL!!!!!!!!!!!
I repeat DO NOT BOIL!
Put a handful of beads into the water. The plastic will be opaque (white) when cool and hard
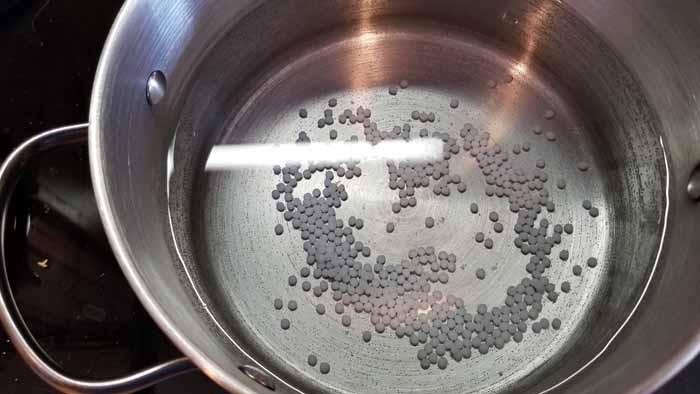
As the water warms up the beads will become clear.
TURN THE STOVE OFF THE VERY SECOND THE BEADS ARE CLEAR.
DO NOT BOIL!!!!!!!!!!!
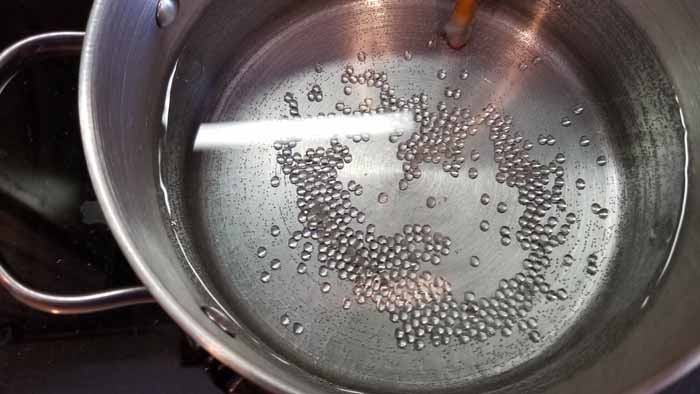
The beads will turn clear when the water reaches around 150 degrees. DONT BOIL.
You dont need to use a thermometer, just heat the water slowly and watch the beads.
when they turn clear, turn off the stove, and use a stick (I used a pencil) to pick
up the beads (DON'T PUT YOUR HAND IN THE WATER).
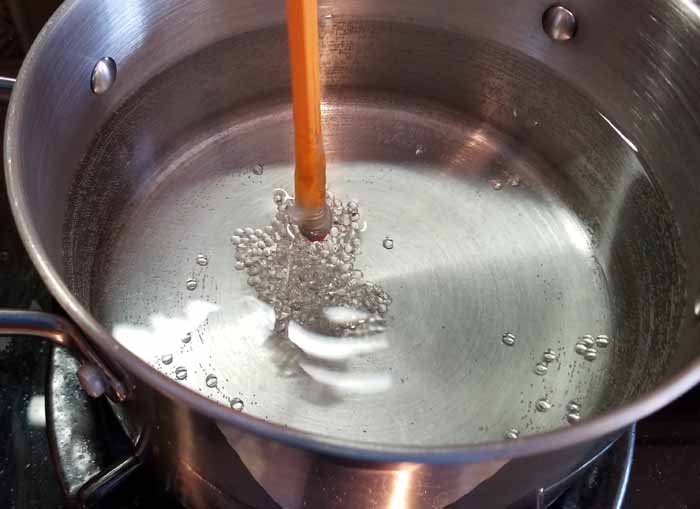
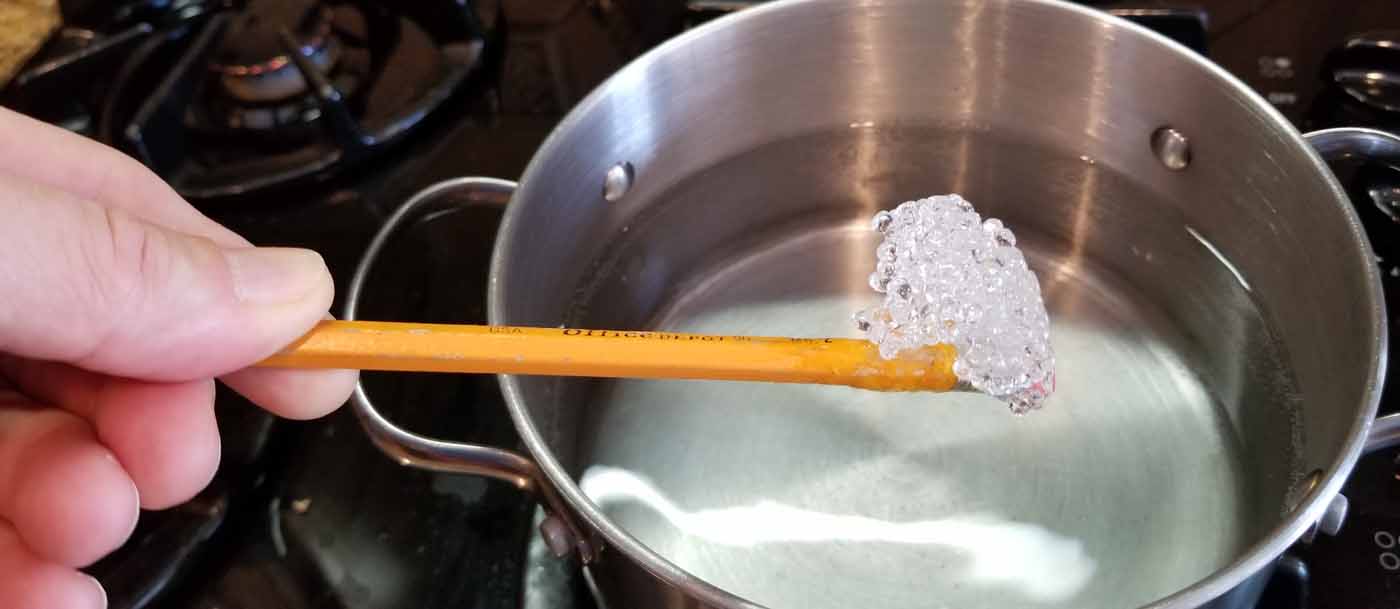
The clump will be stuck to the pencil, most will come off, but some will remain, good bye
sweet pencil eraser.
the clump will be warm not too hot. you can pull it off with
your hands and shape it.
You are putting the material on just one side, the purpose is to hold the grip button in.
If you make the whole "depth" the same thickness, the controller wont slide in easily
and you will have to hold the grip button to insert it, so make it gradually thicker.
This way, it will slide in easy and the inserting motion will squeeze the trigger down
for you.
Start small, its easy to add more material in layers, much easier than trying to remove plastic
if you made it too tight.
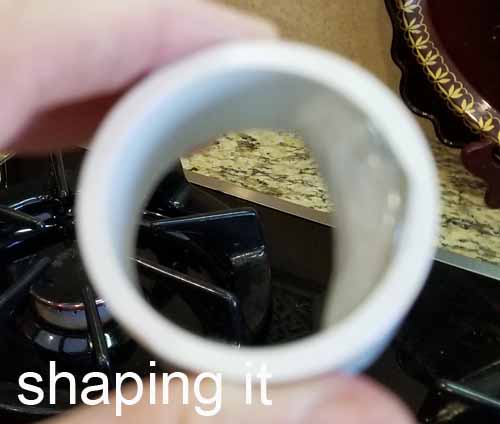
When you think you have a good approximate shape, drop it in ice water for 20 seconds or so.
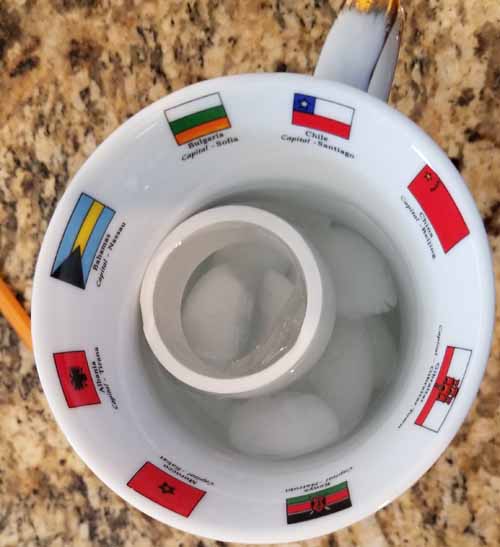
Once cool, I put my controller in. it went in nice, but had a small amount of wiggle room
so i looked at it from the underside and marked the "gap space" with a pencil.
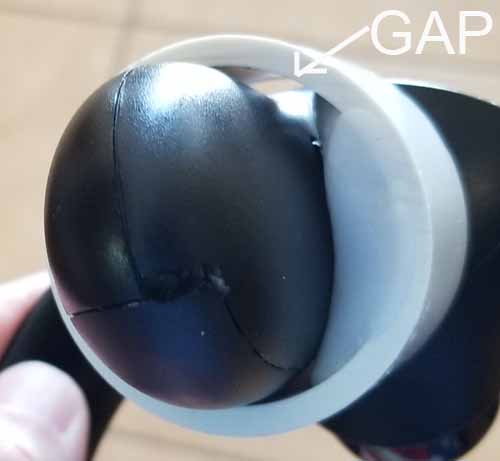
I warmed up a couple more beads and filled in this little area.
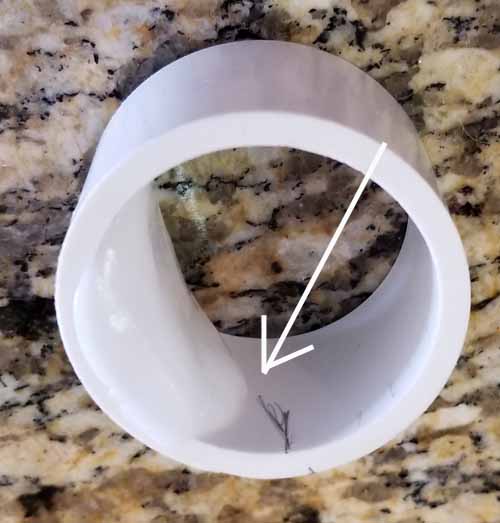
You can drop the whole P5 ring and all back in the water, reheat / recool as much
as you want till you are happy with the controller fit.
DONT STICK YOUR CONTROLLER IN WHILE ITS HOT! IT WILL STICK OR GET STUCK OR GET GOOEY!
Use the stock for a week or so, get a feel for it, and if you want to shorten
or lengthen anything, you have extra PVC. Once you are happy with it, you can use
PVC Cement to lock it all down, but its really not necessary to glue it.
Ready to Play!
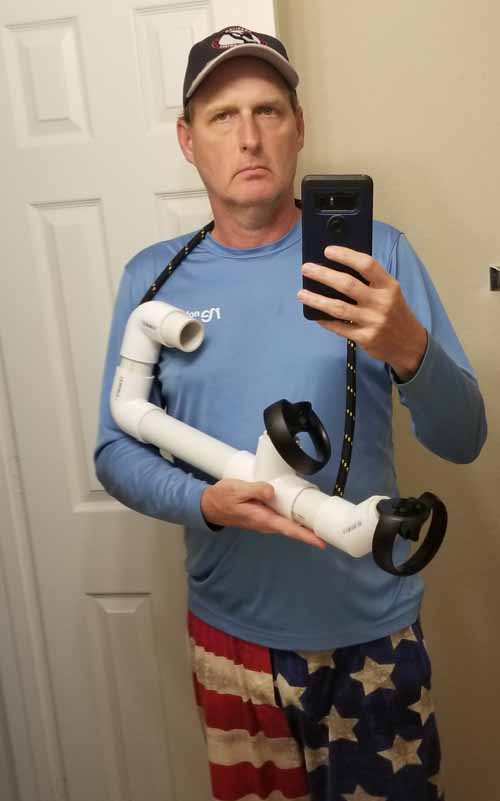
Now if you REALLY want to go custom and you have extra thermoplastic left over, get it warmed up.
Gob it around where your hands will hold the Stock.
Then squish it with the correct hand that will hold it, you can also mold up palm swells.
I didnt bother to make mine look great, i just globbed it on, and it feels PERFECT!
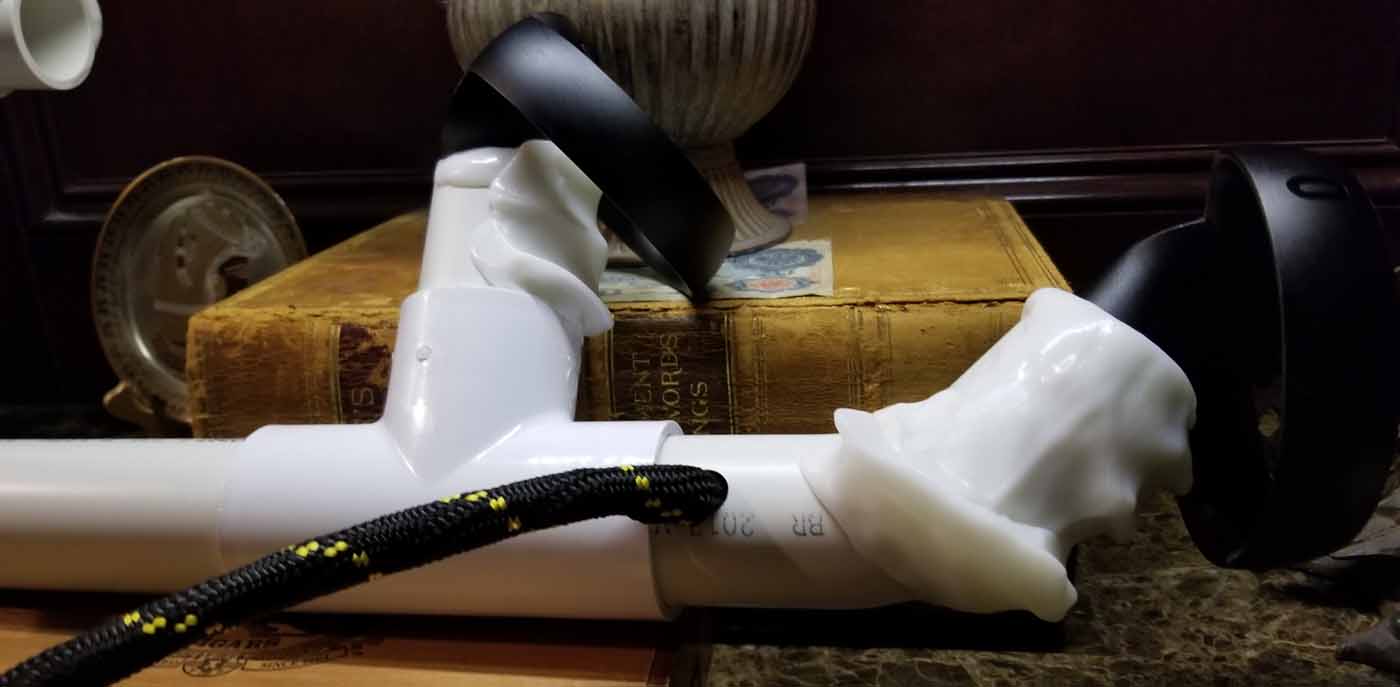
Closeups


